

One of many issues that makes Suikoden II so broadly beloved is that it’s a wealthy, advanced recreation. There’s a whole lot of content material to get pleasure from all through the sport – however one specific quest is unmarked, fully hidden, and moderately tough to finish: Clive’s Quest.
Commercial. Hold scrolling for extra
Being unmarked, the search doesn’t have an official title, however in fan nomenclature it has come to be referred to after the character central to it. On this web page, we clarify how the Clive Quest works, how you can recruit Clive, and how you can beat the search – both naturally, or with a bit of little bit of dishonest. We additionally clarify the rewards, simply in case you resolve it isn’t price pursuing this weirdly esoteric quest in any respect.
How Clive’s Quest & its Time Restrict Works in Suikoden 2
Clive’s Quest primarily boils down to at least one idea: it is a time trial problem. Within the pantheon of RPG facet quests, it most jogs my memory of the notorious Excalibur II facet quest over in Ultimate Fantasy IX, which challenged you to complete a lot of the recreation in a really quick timeframe certainly. The identical applies to Clive’s storyline in Suikoden II.
With a view to full the Clive Quest, you’ll mainly want to finish the lion’s share of the sport in simply 20 hours.
This isn’t very lengthy in any respect, particularly for those who’re being a completionist and following our Suikoden II Walkthrough. In consequence, if you wish to see this storyline play out you’ll should drop a whole lot of the sport, rush previous occasions, skip issues together with missable recruitable characters, and so forth. Having much less time to grind additionally makes fight tougher, in fact.
Because of all of this, we wouldn’t suggest tackling Clive’s Quest in a primary play-through until you’re taking part in the brand new Suikoden II HD Remaster, which has a way to cheat this quest which makes it simple to do on a primary run. Extra on that in a second.
Commercial. Hold scrolling for extra
Clive’s Quest Rewards
The reality is, Clive’s Quest doesn’t actually have any conventional RPG rewards – there’s no shiny new weapon or stack of money on the finish of all of it. All you actually get are scenes and story – cutscenes that reveal background info on Clive and a handful of different characters, revealing some truths about occasions that had been teased even within the first Suikoden.
In the event you’re taking part in the brand new Suikoden II HD Remaster, there’s a secondary reward: an achievement. Titled ‘The Howling Voice Guild’, this secret achievement pops particularly for finishing Clive’s hidden quest.
The related achievement is price 30 Gamerscore on Xbox, and is a Silver Trophy on PlayStation.
Dishonest Clive’s Quest in Suikoden 2 HD
In the event you’re taking part in the most recent model of Suikoden 2, there’s a approach constructed into the sport to cheese Clive’s quest. Don’t fear, we received’t inform anybody for those who don’t…
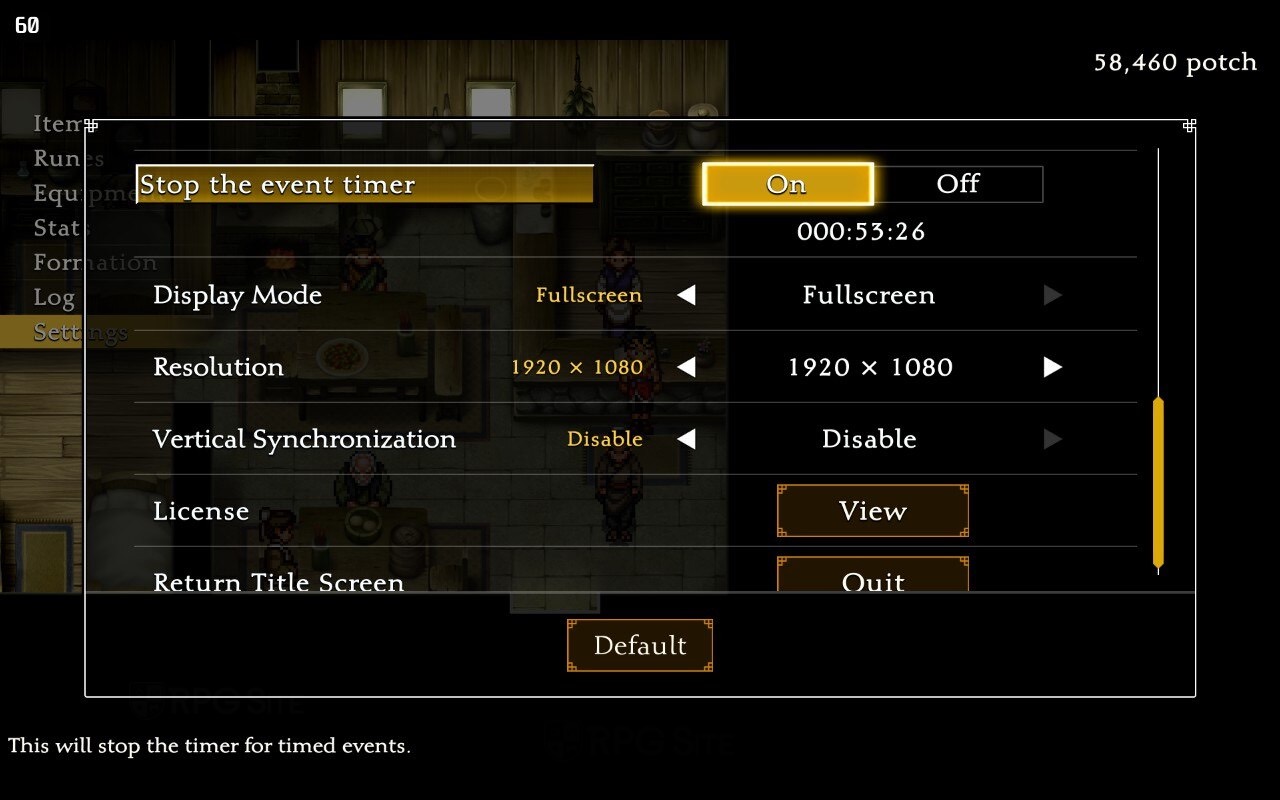
Time-sensitive manners in Suikoden 2 are all managed by what the sport calls the ‘occasion timer’, which is mainly an inside clock the sport makes use of to maintain observe of how a lot time has handed in-world. That is what tracks for those who’re too sluggish for Clive – however within the HD Remaster, you’ll be able to flip the occasion timer off.
To do that, go to the Settings Menu – there’s an choice that’s fairly actually known as ‘Cease the occasion timer’. Flick this to On and also you mainly disable the timer you’re racing in opposition to for Clive’s quest. This implies you’ll be able to take it at a leisurely tempo, observe our step-by-step Suikoden 2 walkthrough, and go for a 100% save.
As a notice, in our testing, different occasions that require a while to move equivalent to cook-offs or Mukumuku’s pals seem to hold on and performance as regular even with the timer disabled. Although for those who encounter any unusual points with quests not progressing, it might not harm to allow the timer once more briefly.
Commercial. Hold scrolling for extra
Clive’s Quest Walkthrough
With a view to full Clive’s Quest, you’ll must progress the story in Suikoden briskly, and just remember to see a number of scenes peppered all through the sport that advance Clive’s hidden sideplot.
The search in the end consists of eight occasions – that you must set off all of them earlier than heading into the ultimate showdown on the finish of the sport with a purpose to see the entire scenes the search has to supply – after which bonus or modified scenes within the recreation’s ending.
Moreover, every step has a timer connected to it – for those who don’t attain every new stage shortly sufficient, you’ll fail the search.
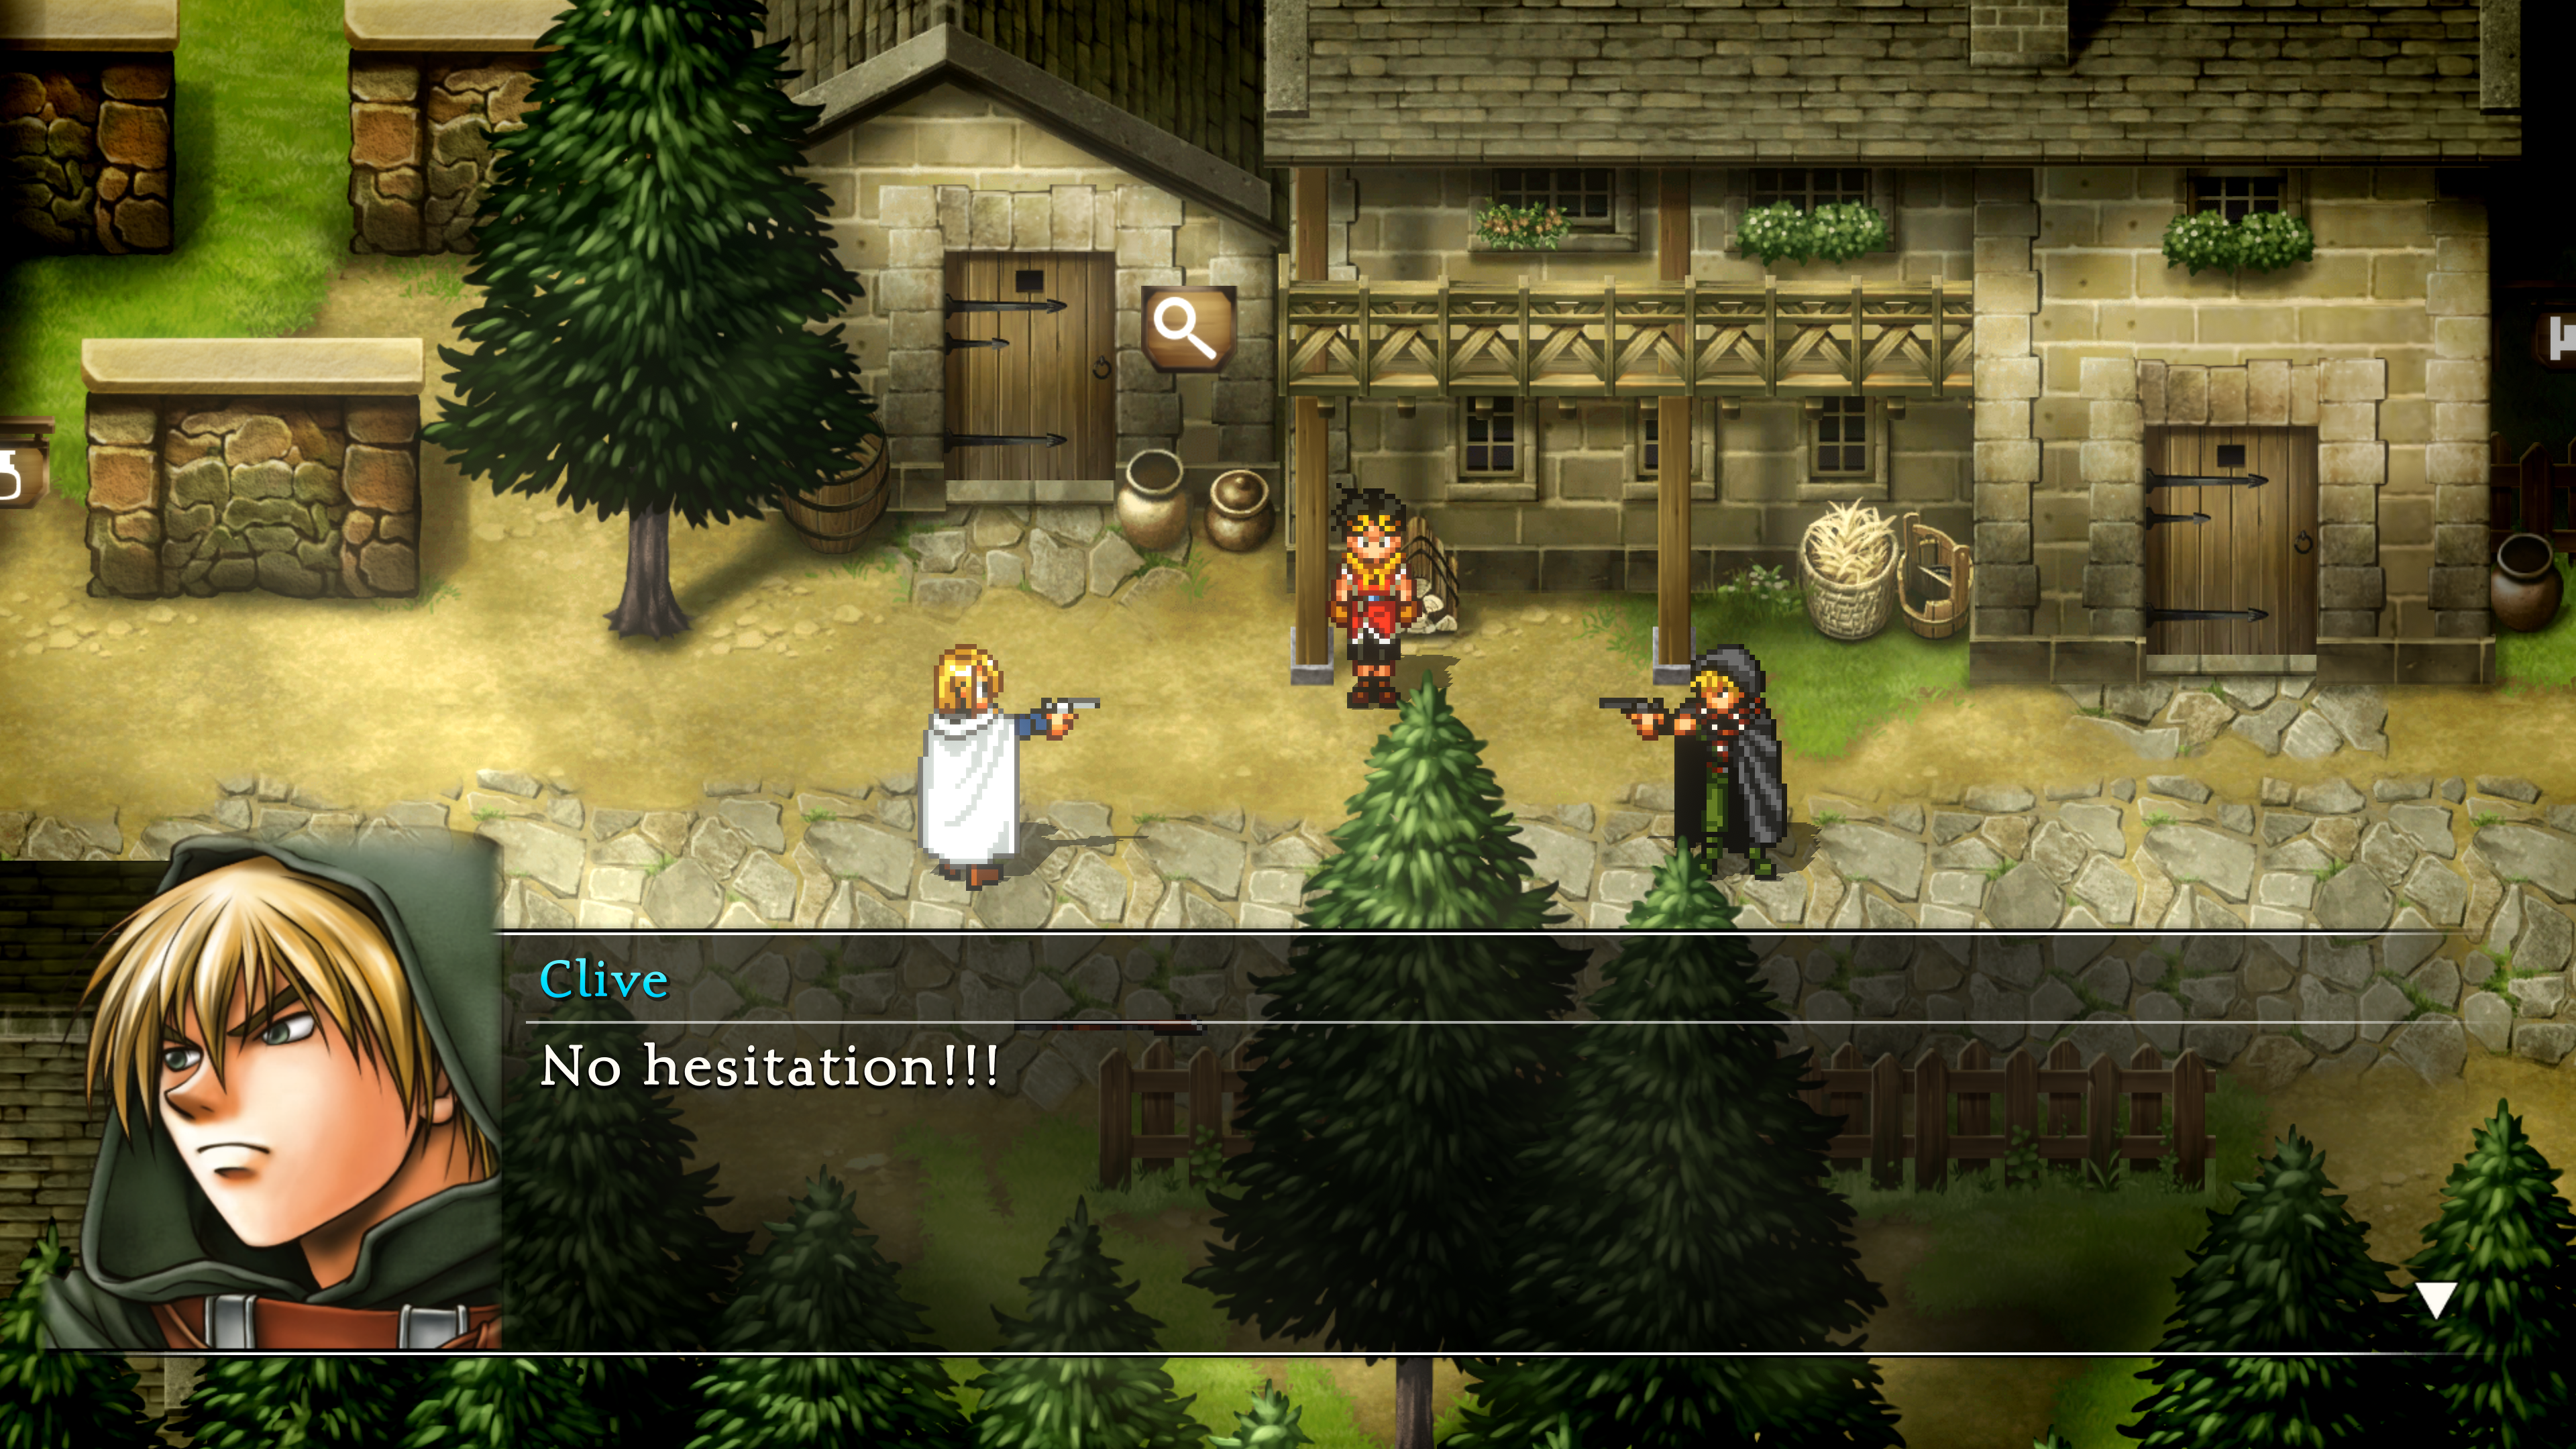
Scene 1: Assembly Clive & Elza in Muse
As detailed in our Suikoden II Character Recruitment Information, it is a missable occasion that’s very important for recruiting Clive, and in flip very important for this quest.
Once you arrive in Muse after the White Deer Inn occasions, head north-east to search out Elza. Discuss to Elza, who asks you to carry on to one thing for her. Agree, and also you’ll meet Clive.
As you permit Muse, you’ll want to present the packages again. Some occasions play out, and that’s that… for now.
The timer begins from the beginning of the sport, not right here, so that you must attain this occasion as shortly as you’ll be able to, however there isn’t any ‘arduous’ time restrict but.
Commercial. Hold scrolling for extra
Scene 2: Clive’s Recruitment
Having now met him, you’ll be able to later within the recreation recruit Clive. Finally the story could have you head to Lakewest City through boat. As quickly as you get your boat and take it out to sea, you can recruit Clive.
You will discover Clive close to the doorway level to South Window. All that you must do is chat to him to recruit him. Once more, you’ll be able to solely recruit him as quickly as you’ve gotten a ship and have no less than as soon as taken it out to sea.
Once more, there’s no arduous time restrict for hitting this level, however it’s best to attempt to hit it by 5 hours in; actually lower than six.
Scene 3: The Letter
With him recruited, add Clive to your lively get together and go to the Lakewest Inn. The innkeep NPC will give Clive a notice, which he actually doesn’t like. The notice factors to your subsequent vacation spot.
It is advisable to attain this scene by the point the occasion timer hits 11 hours.
Scene 4: Forest Trickery
The primary time you enter Forest Village within the Greenhill space, take Clive right here – ideally earlier than heading to Greenhill. Once you enter the village he’ll instantly sense Elza’s presence if he’s in your lively get together.
Go north till you discover a clearing behind the Buying and selling Put up. There she is! Or is it? Not all is because it appears…
You could attain this scene by the point the occasion timer hits 13 hours.
Commercial. Hold scrolling for extra
Scene 5: Trying to find Clues
Go to any Inn across the Matilda Area – the closest will in fact be the one in Rockaxe itself – with Clive in your get together.
You could hit this occasion by the point the occasion timer strikes 14 hours.
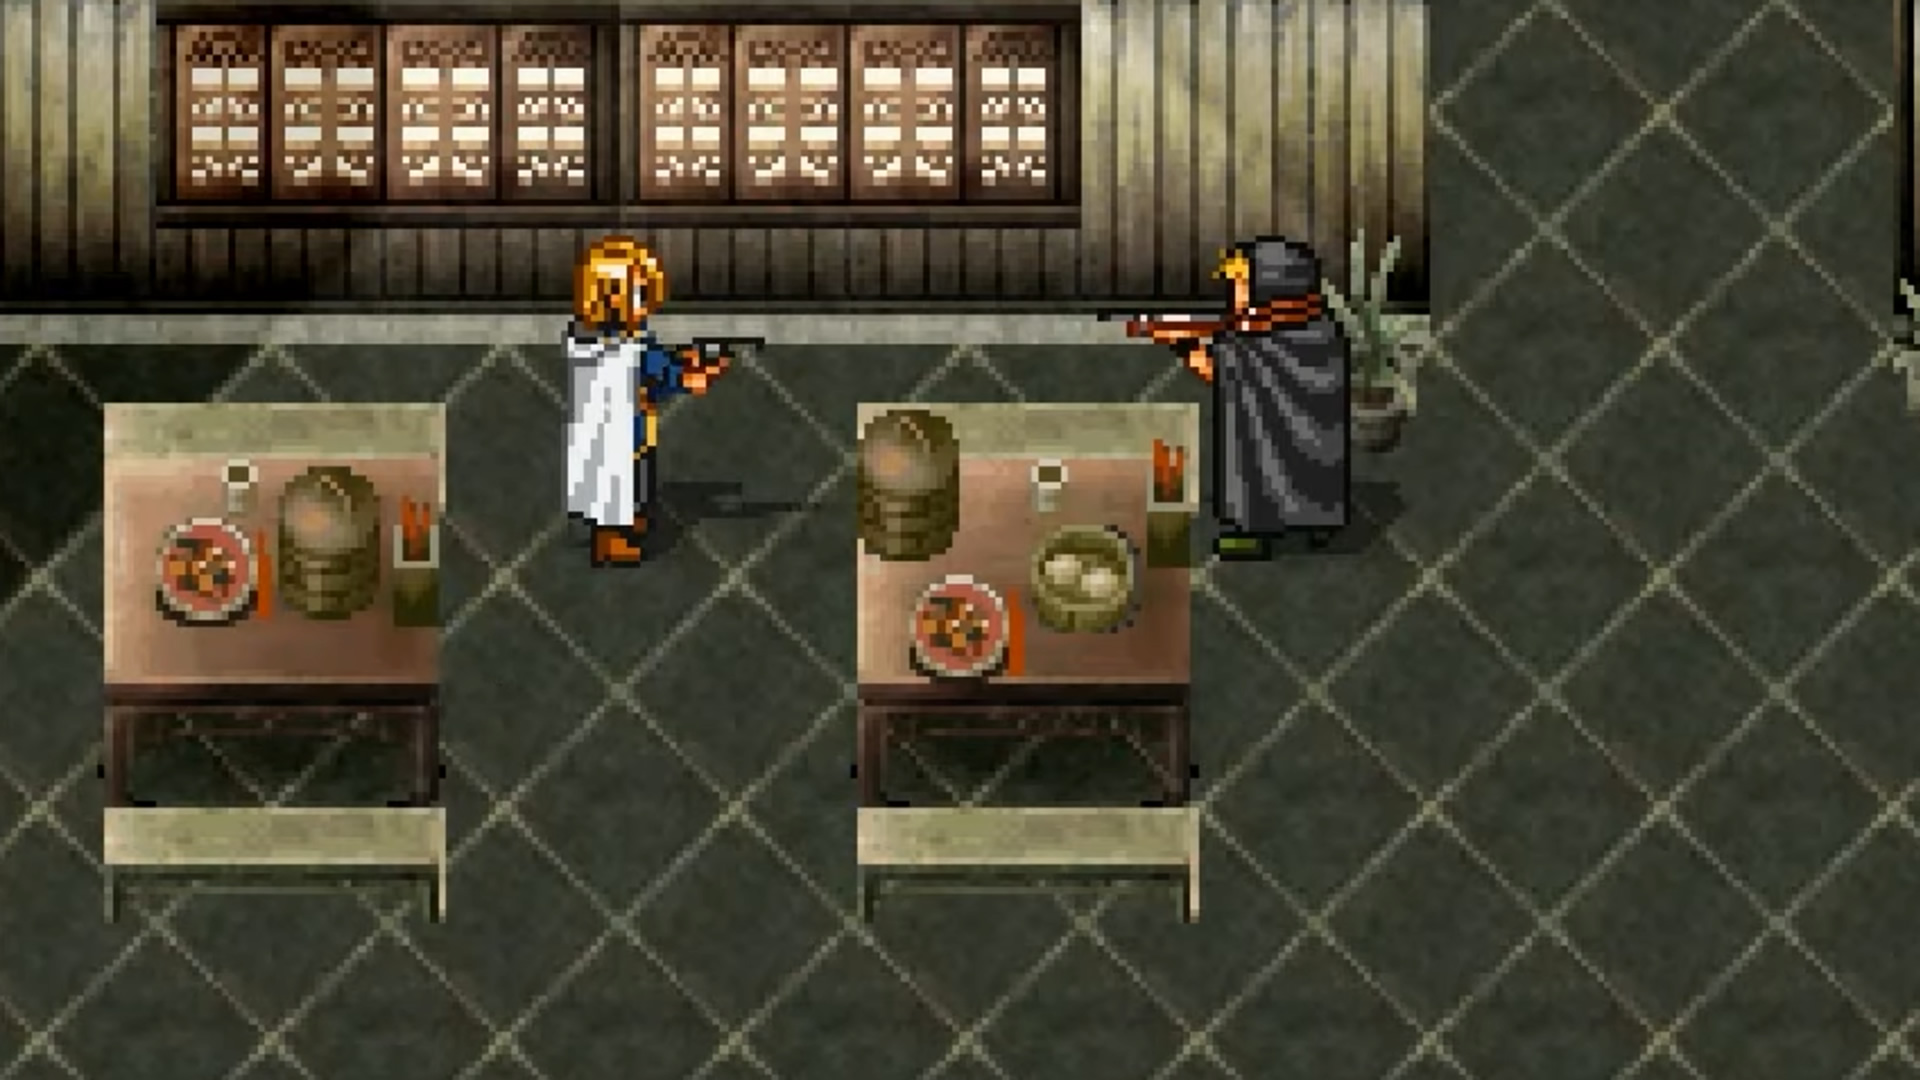
Scene 6: Gunslinging
After ending up in Matilda, earlier than returning to your Fortress, take the chance as a substitute to go to Radat City. Clive wants to stay in your get together, in fact.
Although you’ll be able to see this scene afterward, for those who advance the primary storyline any additional, you’ll be barred from seeing it for fairly a while – so do it proper after clearing out Matilda, however earlier than going again to your fort.
Go into the Bar in Radat with Clive – and watch what goes down. It is advisable to attain this occasion earlier than the occasion timer reaches 15 hours.
Scene 7: The Reality
After Rockaxe is freed late within the recreation, take Clive to Muse. On the prime of Jowston Hill, one other fateful encounter takes place.
Scene 8: Decision
Commercial. Hold scrolling for extra
You’ll be within the remaining stretch of the narrative at this level. Once you’re getting ready a military to take to L’Renouille, put Clive in your get together and delay the massive battle – as a substitute, take your get together – which ought to include your strongest characters – north-west, to Sajah Village.
The tip of the storyline performs out right here. Naturally, that you must hit this by the 20 hour mark.
With this, Clive’s quest is accomplished. In consequence, you’ll know extra about these characters, and even see some barely totally different variations to sure ending scenes. Congratulations on finishing the problem!
Tricks to Hold in Thoughts
In the event you’re racing the timer for actual, there’s a number of issues it’s best to do and keep in mind to have one of the best probability of constructing it:
- Hold Clive with you. When you recruit him, you would possibly as effectively simply depart him in your get together – his presence is required for all scenes, and swapping issues round simply wastes time.
- Arrange for velocity. Run from battles usually, hammer by means of dialogue, and run in every single place. Don’t overlook to additionally set the textual content velocity to ‘Quick’ within the recreation settings.
- Solely speak to NPCs crucial for advancing the story. Our walkthrough is useful for pinpointing these.
- If given the choice to listen to extra about one thing or not, at all times select to not – preserve issues transferring.
- In the event you die, preserve going. Quite than reloading, keep on – you keep EXP earned for the reason that final time you saved. The truth is, typically dying could be useful on this sense.
- [This has been patched, and therefore doesn’t work, in the HD Remaster, only the original PS1 version] Use the ‘Matilda trick’. This bug allows you to push the gate on the Muse/Matilda checkpoint when it’s closed with a purpose to drive your well past, earlier than the gate will get opened within the story. This allows you to battle highly effective enemies and stage up quick, which expedites the velocity of different battles. This does imply enduring some very tough fights, nevertheless – however that is the place dying intentionally can turn out to be useful.
